Contents
Welcome to our guide for using our issue tracker, repository platform and task manager, GitLab. All information here is explained (by a team of technical writers, which is probably better than this guide ![]() ) at GitLab user documentation, so don't hesitate to consult that and search there for better and deeper information. This guide will focus on the basics for GNOME people new to GitLab (and GitHub alike) workflow.
) at GitLab user documentation, so don't hesitate to consult that and search there for better and deeper information. This guide will focus on the basics for GNOME people new to GitLab (and GitHub alike) workflow.
Log In
If you are a member at GNOME or you have commit access, most probably you have a LDAP account at GNOME. If you do, please use your account to log in. In case you lost your password visit the recovery page for your account.
If you are an external user or reporter, you can use GitHub, GitLab or Gmail accounts to log in, or optionally create a new one inside GNOME GitLab.
Please verify whether the SSH public keys fingerprints are legitimate before performing any Git-related activity. Query DNS (the gnome.org zone uses DNSSEC) for SSHFP entries (SSH client VerifyHostKeyDNS option) by running the command
ssh -o VerifyHostKeyDNS=yes ssh.gitlab.gnome.org
Code Projects
All GNOME code projects are hosted in the GNOME group.
Permissions
All people part of the gnomecvs (former group that allowed read/write access to git.gnome.org) LDAP group have developer permissions. These permissions are set automatically and shouldn't be modified. The GNOME Infrastructure Team is currently in charge of adding new users having the "reporter" permission: useful for non-code contributors like the Bugsquad or designers as it allows you to comment and eventually close issues and other permissions as shown on the documentation. Please open an issue here for requesting such permission, make sure you have a good rationale before doing so though.
Non GNOME member set up
First of all, welcome to GNOME!
In order to contribute follow the next steps:
make sure you are logged in.
upload your ssh keys to GitLab if you didn't do so yet. You can do it at the ssh keys options in GitLab. You will find there instructions to generate one if necessary.
GitLab workflow for code contribution
Using the canonical project - GNOME developer
If you are a developer or maintainer of a project, most likely you don't need to create a fork to work on your project. You can use branches directly in the canonical project. The workflow to fix an issue is as follows:
Go to the issue and press "Create merge request" in the browser, or create a branch in the command line (with git checkout -b nameOfYourBranch origin/master if the main branch is called "master", or git checkout -b nameOfYourBranch origin/main) if the main branch is called "main".
Locally check out the branch (if you create a branch in the browser) with git checkout nameOfYourBranch
- Locally create commit with a commit message that includes the comment "Closes: $FULL_LINK_TO_ISSUE"
- Push branch
In the command line a link to create or visit the merge request will be generated, click it. Optionally, you can create a merge request from a branch in GitLab UI.
(Note, you can also use the "Non GNOME developer" workflow below if you prefer.)
Using a fork - Non GNOME developer
In the GitLab UI, go to the project you want to contribute to and click "Fork" and fork it under your username.
Clone your forked repository with git clone forked_project
Add the original repository as upstream with: git remote add upstream https://gitlab.gnome.org/GNOME/projectname
Create a branch for your work using git checkout -b my_work
- Locally create commit with comment "Closes: $FULL_LINK_TO_ISSUE"
Update and rebase your branch with upstream with git fetch upstream master && git rebase upstream/master.
Push your branch to your fork with git push origin HEAD
Create merge request either by the link that shows in the command line after pushing or in the GitLab UI clicking "Create merge request" in your branch.
Optionally, instead of creating a branch you can push your current branch to a different remote branch like git push origin HEAD:remote_branch_name.
Review and applying changes
Here let's explain the steps to be followed by each side, contributor and reviewer, of a regular workflow.
Once the contributor creates a merge request, the maintainer can test the changes locally. You will see instructions to do so in the same merge request.
Once the changes are tested locally, the maintainer can review the code. To do so, go to the "changes" or "commits" tab and review the changes in there. It will create "discussions" entities, which need to be resolved and allow sub discussions in them to keep things organized.
Now the contributor can make changes and upload the new version. To do so, make your changes locally, rebase your branch, and do a push with the force option, like git push origin HEAD --force, this will replace the branch in the merge request with the new content.
Merging
Usually you will wait for the CI to finish, and if things look fine now, you can merge the merge request clicking "merge". Note there is an option to remove the branch associated with the merge request, usually you would want to do it.
If you want to merge in the command line feel free to do it and push directly from there, just make sure the branch in the merge request is the same as you have locally, otherwise the automation in GitLab won't fire up and you will have to close the merge request yourself.
Problematic cases
- The merge request has conflicts
Ask the contributor to fix them and upload a new version, or as maintainer do it yourself in the GitLab UI with the built-in conflict merge resolution.
- The merge request needs modifications
If the contributor enabled Allows commits from members who can merge to the target branch in their MR, you can force push to their branch with your modifications. This can be done with the following command.
git push git@gitlab.gnome.org:{username}/{project-name}.git HEAD:{contributors-branch} --force
For branches from other gnome developers it is even easier, they can just be regularly force pushed.
If this does not work for some reason, you can always open a new MR with the changed code.
GitLab workflow for the Bugsquad
The Bugsquad usually triages issues, with GitLab you will use labels for most of the tasks.
Permissions
First, you should have reporter permissions in a single project or in the GNOME group. This will allow you to manage issues for most part of it.
Issues
Issues are the main entity for bugs, features and tasks. Usually you will see the issues of a specific project like nautilus, or the GNOME group as a whole.
You can create, close, mark as duplicate, move to a different project, etc.
The most special case is to mark an issue as duplicate, which right now is done with what is called "quick actions". To mark an issue as duplicated, in the comment section put /duplicate #number and it will close as duplicate of that issue. Since this is not ideal, we are tracking how to improve this upstream.
You can read more about issues in the upstream documentation.
Labels
Labels are the core part of the workflow for the Bugsquad. You can read in the upstream documentation what are them, but basically are tags you can put to a issue.
We created a few that are shared for the GNOME group, you can take a look at them here, as you can see they use different colors to differentiate between types and have a prefixed number for correct ordering. Each project can have its own labels, for instance this is useful for components and they use the number "5" for it, and you can see as an example nautilus. You can take a look at the discussion we had about labels in case you have some feedback.
Non-code projects
GitLab can be used also for non-code projects, more like a task manager, thanks to the labels, kanban board, and other features. This guide can be useful for example for the engagement team or the design team.
GitLab can be quite noisy for a non-technical person using it, although effort is being made to improve that, there is still some learning that needs to be done. Once is done, it should be quite straigforward and if you need any help with setting up automation and try to get all the power from the product, feel free to contact Carlossoriano. The basic usage is explained in the following sections.
Looking at issues (a.k.a tasks and community requests)
GitLab has the concept of "issues" to define tasks, requests or problems which you have a variety of tools to manage and track. From now on we will call them "issues". If you want to see all issues click in the issues button in the left sidebar. For example here are the issues of the engagement team.
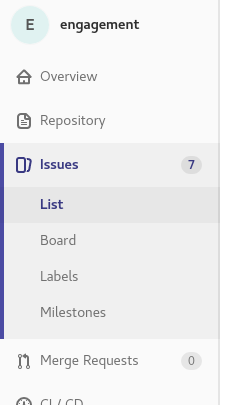
You can also see all the kind of issues using what is called "labels" that is used to mark and be able to filter different types of issues/tasks/requests. You can see them clicking in the sidebar labels. You can see an example of the "social media" requests by the engagement team here.
Adding images
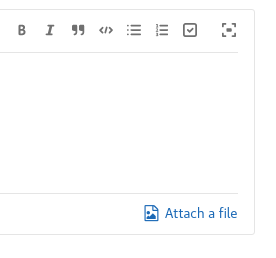
You can use the buttons you have on the bottom when commenting on an issue or simply drag and drop your images from your desktop.
Due dates for tasks
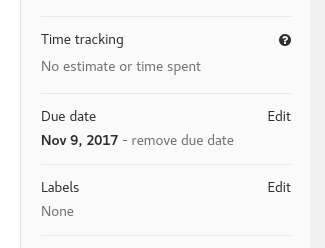
You can look in the sidebar, the section "due date" for when a issue should be done. You can also edit it clicking on it to change it.
Subscribing to changes in a issue
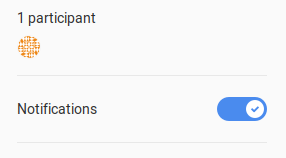
You are subscribed to an issue if "notifications" are turned on. Turn notifications on or off in an issue to subscribe or unsubscribe. You don't have to be in the list of participants to receive notifications.
Subscribing to changes in a project
To get notifications for all task activity in a project, go to the "Project overview", click the notification bell icon, and choose your settings. For an overview of your notification settings, see https://gitlab.gnome.org/profile/notifications
Requesting attention/notifying someone
You can request the attention of people by doing "@" and their name. For example @sri. The one that was mentioned will receive an email and a ToDo item.

Assigning to an issue
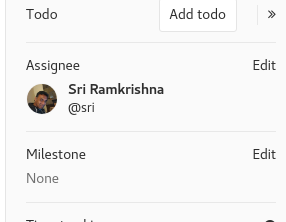
You can either just comment in the issue, or click in the right sidebar to "assignee" and add yourself.
CI
Read on https://wiki.gnome.org/GitLab/CI
