Cheese (Full Report)
Cheese is a Photobooth-inspired GNOME application for taking pictures and videos from a webcam. This redesign started out as a project for Fabiana Simões, an intern brought in for the mid-2012 GNOME Outreach Program for Women. This page shows the work and progress done during her internship (Final outcome)
Contents
Current Issues
- Opens default photo viewer or video player in order to view photos and videos
- Not possible to apply effects after a photo is taken or a video is recorded
- It is not clear where Cheese is saving the photos and videos
- It is not possible to set another default location for saving photos and videos
- To save photos and videos in a different location, you have to right-click the image in the stream and click 'Save As...' (generate duplicates)
In the stream (context menu), the difference between 'Move to trash' and 'Delete' is not clear? (indeed, the keyboard shortcut to 'Edit > Move to Trash' is [Delete]
- 'Share' opens a dialog called 'Send To...': Lack of consistency.
- In the 'Sent To...' dialog, the 'Send as' and 'Send to' fields might be confusing
- From the 'Send To...' dialog, it is possible to create CDs/DVDs and send files to disks. Since the dialog is opened when 'Share' is selected, these options seem a bit out of context.
- It is hard to get out of fullscreen mode (you have to know the keyboard shortcut)
'Edit > Move to Trash' is enabled when no photo/video is selected
'Edit > Move All to Trash' is enabled when there are no photos/videos in the stream
Does not require confirmation when 'Edit > Move All to Trash' is selected
'Edit > Effects' might be confusing
'Edit > Effects' relate to effects that may be added before taking photos or recording videos. The rest of the options under 'Edit' are related to actions available after taking photos or recording videos. This might me confusing.
Relevant Art
CrazyCam
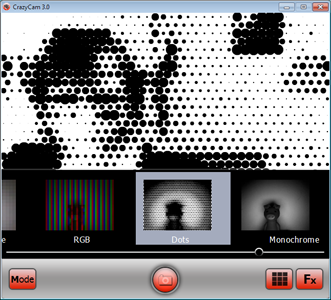
Ups:
- It is very important to establish clear metaphors with icons. In this case, icons are very confusing.
- Poor feedback while/after performing actions such as taking a photo or recording a video.
- After using several webcam applications, the decision for [Fx] for effects and [Mode] for changing between photo and video modes seems weird. Applications in this domain usually share signs in common for these functionalities.
- You can only see what a effect will look like when applied after selecting it.
ManyCam
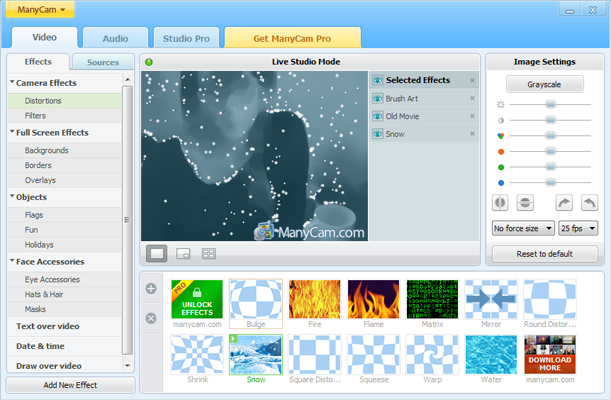
Ups:
- Large collection of effects, including not only distortions and filters, but backgrounds, borders and several categories of stickers.
- It is possible to combine multiple effects when taking a photo or recording a video.
- You can download new effects.
- You can change image settings such as color channels, brightness and contrast. Even though this might be nice for experts, might be an overkill if you just want to take some fun pictures.
- You can write text or draw over video.
Downs:
- You can change image settings such as color channels, brightness and contrast. Even though this might be nice for experts, might be an overkill if you just want to take some fun pictures.
- I think it would be nice if there was an easier way to navigate in the effects menu.
- Since you can combine effects, it would be nice if there was a way to "turn effects on/off" without removing them from the 'selected effects' lists. Users might want to explore combinations without having to go through all the menus to find a effect he/she just removed just to quickly see what would happen. This is critical here since there are a number of effects menu.
- Overall, the application looks rather "professional". The possibility of using several effects at once might result in some really funny combination. However, functionality to easily manage selected effects add extra complexity to the application. This might be a dealbreaker for people wanting to record a quick and fun moment.
Snap!
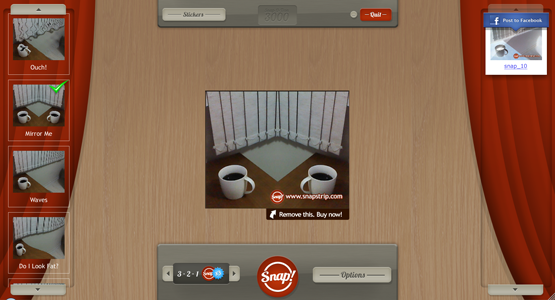
Ups:
- East to share photos on Facebook.
- Besides applying a effect to the video, users might also use stickers such as speech bubbles (possible to edit its inside text), hats, clothes and decorations.
- 4 modes of capture. Icons are easily grasped.
- One picure (Snap!)
- Countdown and one picture (3.2.1 Snap!)
- Three pictures (Snap! x3)
- Countdown once and three picture (3.2.1 Snap! x3)
Downs:
- It would be nice if sticker were as easy to navigate as effects.
SparkBooth
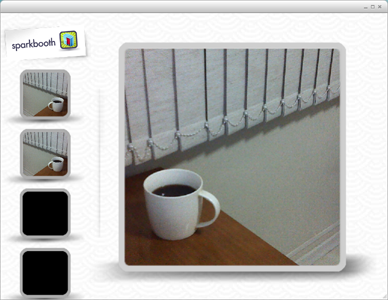
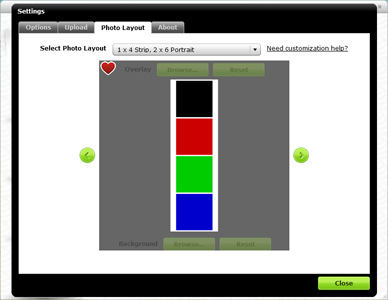
- Its main functionality is take photos to compose filmstrips. Because of this, works only in 'burst mode'.
Ups:
- Considering its 'burst mode', you can imediately see each photo right after it was taken.
- Filmstrip layout customization. You'll always have filmstrips with 4 photos, but there is a wide range of 4-photo layouts to choose from.
- You can select a picture to be the background of the filmstrip.
- You can add overlay dragging a png or a gif over the layout.
- You can set layouts as favorites.
- Relevant/interesting controls in 'Settings', such as: save Folder, countdown and timing settings, on-screen messages when a photo is being taken, keyboard shortcuts, etc.
- Keyboard shortcuts!
Downs:
- No effects to apply in pictures (only a few color mode options under 'Settings')
- Layout customization is a lot of fun and it is Sparkbooth's main functionality. I think its dialog should be easier to find, not hidden under 'Settings'. The same happens with the functionalities to share photos (even more hidden under the 'Upload' tab in 'Settings').
- Not easy to navigate between filmstrips in gallery mode.
- Confusing buttons and icons.
PopBooth App
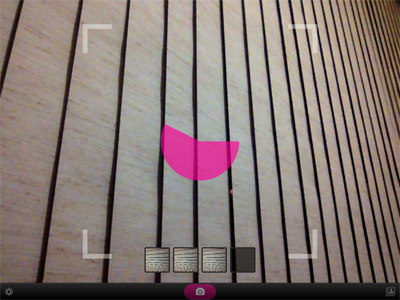
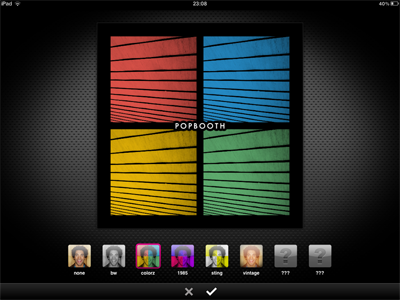
- Creates filmstrips with pictures (always 4) taken in a row. Because of this, works only in 'burst mode'.
Ups:
- You can apply different effects (pre-defined in sets) to each photo in the filmstrip.
- Shows framing when taking pictures.
- Considering its 'burst mode', you can imediately see each photo right after it was taken.
- Nicely present the interval photos are taken in form of a time wheel. However, it could present a countdown when time is running out.
Downs:
- It is not possible to create new sets of effects or mix the existing ones.
- You can only see what a effect will look like when applied after selecting it.
Playface DX App
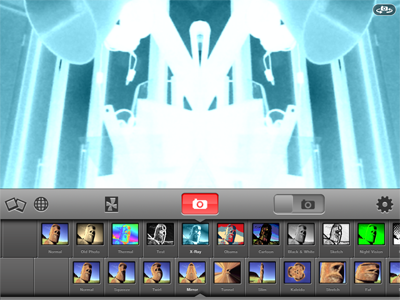
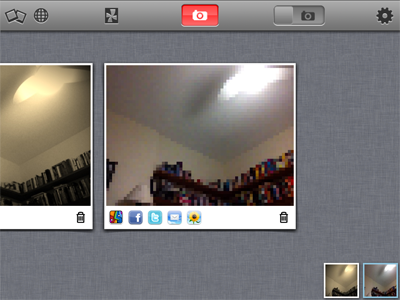
Ups:
- Have two categories of effects, distortions and filters, and you can combine two effects, one of each category of effect.
- Its is easy to navigate in the gallery. Also, there are actions you can easily perform on items in the gallery, such as share and delete.
- From the app, you can see photos other people using the app took (but the globe icon is kinda confusing, actually).
Downs:
- The difference between categories is not very clear. It might be confusing why you can mix some effects, but not others.
- You can only see what a effect will look like when applied after selecting it.
Photo Booth for iPad
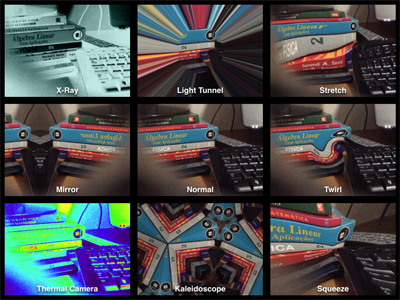
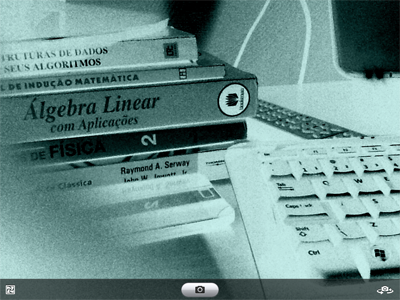
Ups:
- Nice preview of how graphical effect look like when applied.
Downs:
- Very limited. The app lets you take a photo using a selected graphical effect.
- No photo management options (not even to view the photos you just took).
MegaPhoto App
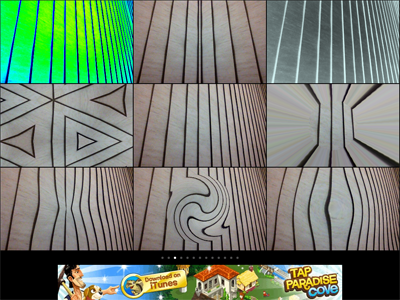
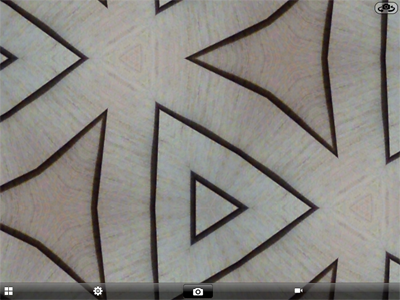
- Looks very much like Photobooth for iPad, but you can record videos with it.
- The effects icon is very similtar to other applications' gallery icon. The effects icons is a problem in almost every application I used.
Downs:
- I don't think a button is the best choice to represent the possible modes in which the app operates. It is a different 'call to action' from taking a photo, for example.
CamCool HD App
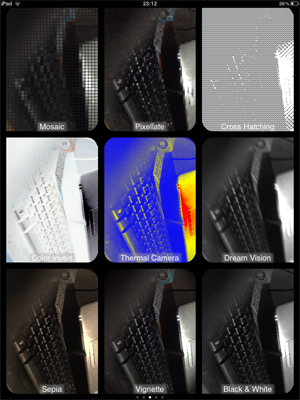
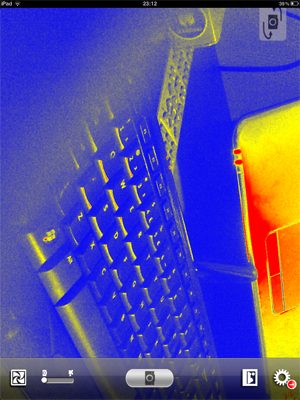
- Looks very much like Photobooth for iPad, but you record videos with it.
Ups:
I think this is a better choice, comparing to MegaPhoto, for a control for changing between photo and video modes.
- You can do some basic photo management from the app (Up comparing to other iPad apps).
FotoFriend
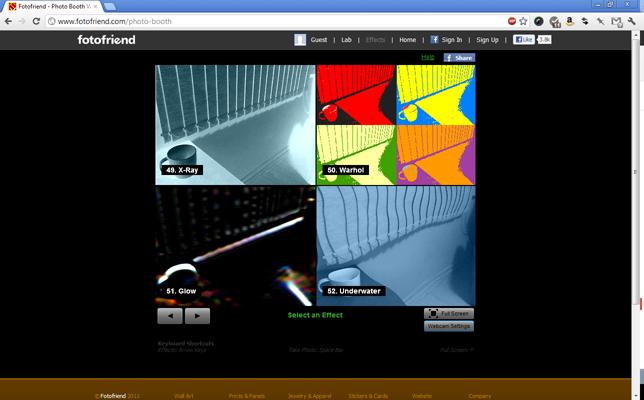
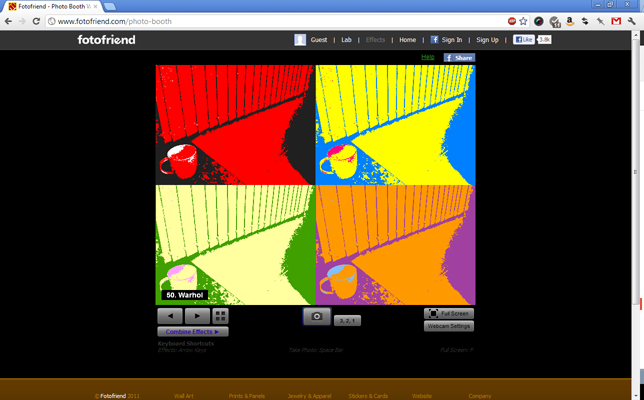
Ups:
- You can choose on having a countdown or not before taking a photo.
- It is possible to combine effects.
You can upload photos to the FotoFriend website, with captions.
- From the website, you can reply to other people's photos with a new photo.
Downs:
- Controls for navigating through effects are very, very confusing.
- It it not simple to combine effects.
- A lot of the action happens through the website.
The LOL Cam
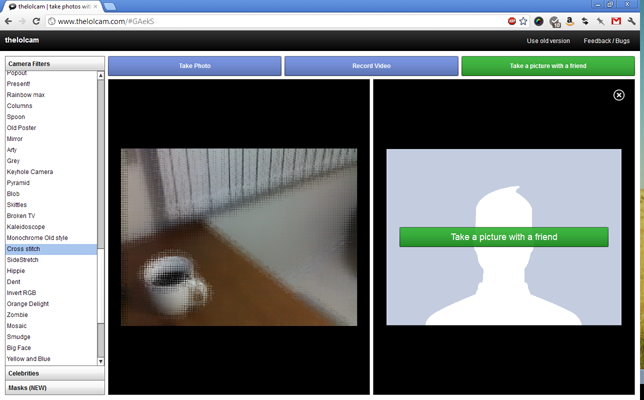
Ups:
- You can add stickers (such as celebrities, so you can fake pose with them).
- You can take a photo "with a friend" using The LOL Cam. I'm not sure, but it seems to me other people may change the effects on your part of the screen. Good for jokes, but can easily get annoying.
Downs:
- No preview for effects. You have to select a effect to see how it looks like. Also, most of the time, the names of the effects are not very informative.
User Research
While drawing these first mockups for Cheese, as a natural consequence, most of my design decisions were based on the quick usability test I did when my internship started. That being said, I thought would be nice to write a short report on my findings when user testing Cheese to give some insight about the rationale behind this first proposal.
What I did
I asked two friends, a MS Computer Science student (CS) and a MA Political Science student (PS), both first-time users of Cheese, to perform a few tasks using Cheese. I tried to cover most of the tasks listed in Cheese's inside-app help, selecting tasks as taking pictures, choosing effects, and managing photos and videos. Participants had all the time they needed to perform the tasks and were encourage to think-aloud during the test. After user testing sessions, I had some sort of a "focus group" with both CS and PS.
What I observed
- Participants were not pleased to have another application open just to quickly view a photo they took or a video they recorded. Both participants tried to find ways to view the items in the stream inside Cheese, looking all over the UI and checking context menus repeatedly.
- PS wanted to change image brightness but couldn't find its controller under Preferences. CS found the Image controllers quickly, but complained they were a bit hard to get to. For this participant, the location of the Image controllers was a deal breaker, since he wanted to change them quite often.
- PS asked if it was possible to apply effects after a photo was taken. CS seemed to wonder about the same, right-clicking items in the stream when in effect selection mode and inspecting context menus.
- Both participants had problems with 'Burst Mode'. When the first photo was took and appeared in the stream, both participants seemed to think they were still in the regular shooting mode. They seemed to realized 'Burst Mode' was indeed active only when the second photo was took (indeed, they do look pretty confused in these photos :-D). Both CS and PS complained they were expecting something like a filmstrip as a result of shooting in 'Burst Mode'. They also stated they couldn't quite get how 'Burst Mode' as it is could be useful.
- PS seemed a bit disappointed with the customization options offered by Cheese. PS mentioned several times it'd be great if she could draw or write over the pictures. CS agreed with that. Both PS and CS wanted to "mock the photos" they took, in addition to applying effects.
- CS thought it was hard to know where the photos and videos were saved. When he eventually found out, he wanted to change the default folder and was upset when couldn't find the control to do this.
- Both PS and CS were confused with the 'Share' options. Once PS read the 'Burn to CD/DVD' option in the 'Share' combobox, she was convinced she was in the wrong place, specially once she saw the dialog was titled 'Send to'. CS complained about the 'Share' options, he said he wouldn't use any of them besides e-mail and IM.
- When presented to the sharing options, PS asked about the possibility of posting photos to social networks such as Twitter and Facebook.
- In the context of having another application open to view a photo, CS complained about integration. Besides wanting to open photos inside Cheese, after finding out it is not possible make changes to a photo after it's taken, CS wanted to open photos with an editor using the context menus.
Using the 'Edit > Effects' menu, PS thought she could actually change the effects configuration.
Goals
Primary
- Be fun
- Be easy and effective ("just start it and shoot")
- Take photos
- Take several photos in a row
- Record videos
- Apply effects to photos and videos
- View photos and videos
- Delete photos and videos
- Share photos and videos easily (E-mail, IM, ...)
- Settings should be easy and fast to change
- Should scale to smaller displays
Non-Goals
- Not a photo/video management tool
- Not an editor
Discussion
On features:
- Is it possible to combine graphical effects?
- Yes, but this can slow things down a lot
- Apply effects after a photo is taken or a video is recorded?
- For using stickers, this is probably very necessary.
- Arrange photos taken in 'Burst mode' in a filmstrip?
- Configure filmstrip: Layout, Border (Color, Patterns)
- Layers: Stickers (accessories, speech balloons, rage comics?), Frames
- Depending on the frame type, it would be nice to add text labels (like in polaroids, for example)
Needs configuration options for effects (in gnome-video-effects)
A patch for gnome-video-effects is available, but the performance can be quite bad
- Simple frames should be fine
- Depending on the frame type, it would be nice to add text labels (like in polaroids, for example)
- Expand share options (Any plans for Facebook/Twitter integration)?
- Needs work on the nautilus-sendto project, as that is how the sharing feature is implemented
- Integration with Photos
Previous mockups
First round
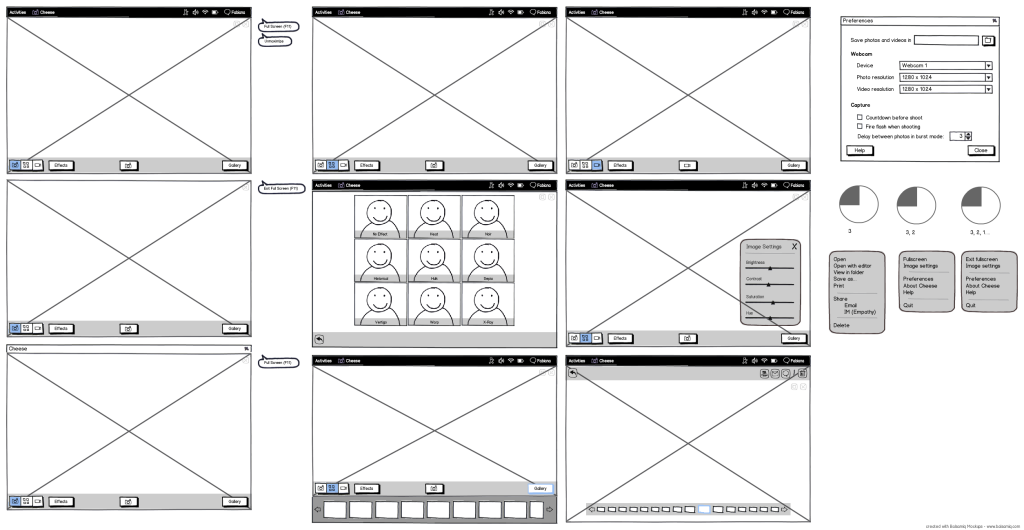
This is a first tentative design for Cheese. It covers all the currently existing functionalities and adds a few changes, such as:
- View Mode for photos/videos taken/recorded with Cheese.
- Options to change the default folder to save photos/videos.
- A panel for changing images settings before or after taking pictures or recording videos.
- Pie countdown in burst mode
- Burst mode creates a single photo with 4 areas, instead of 4 different photos (similar to Photobooth for Mac).
- Possibility of resizing the photo/video stream, even hiding it.
Main functionalities
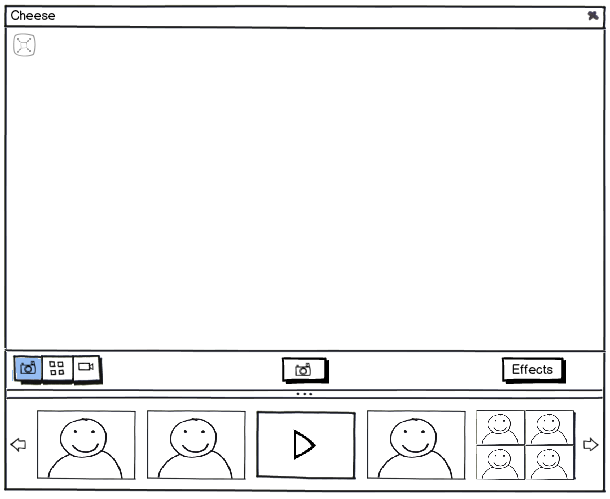
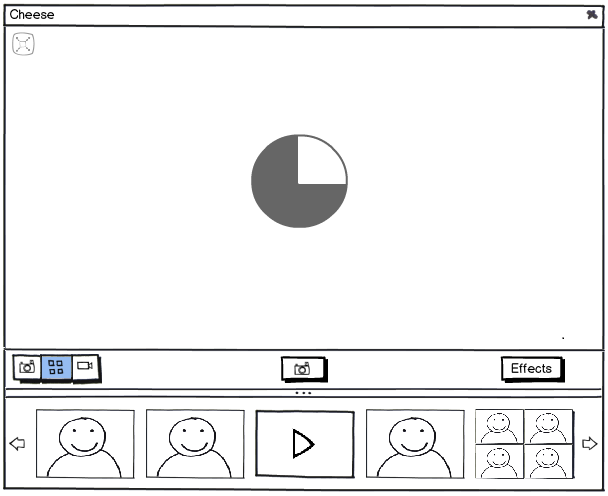
I suggest burst mode would generate a single photo (filmstrip like) instead of 4 different photos, similar to Photobooth for Mac. This suggestion is based on tests I conducted with a few users: They couldn't quite get the utility of burst mode and thought it would be more fun if it generated some sort of filmstrip with the photos.
The "pie countdown" is probably better when taking photos in burst mode. It gives a better idea of how long the user have to prepare until the next photo. If the delay between photos is set to more than 5 seconds, it would be nice to have a 3-2-1 countdown behind the "pie counter":

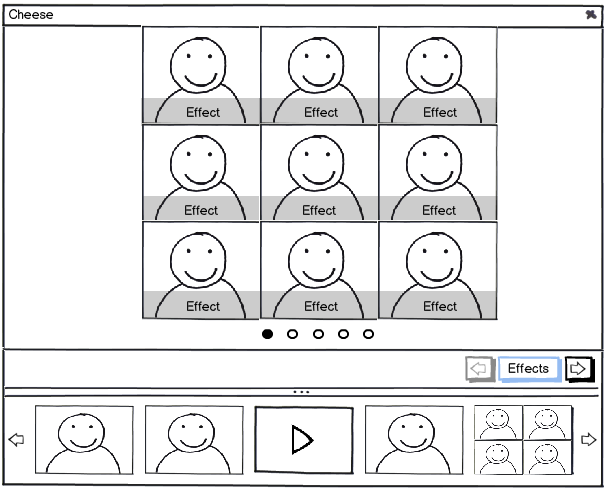
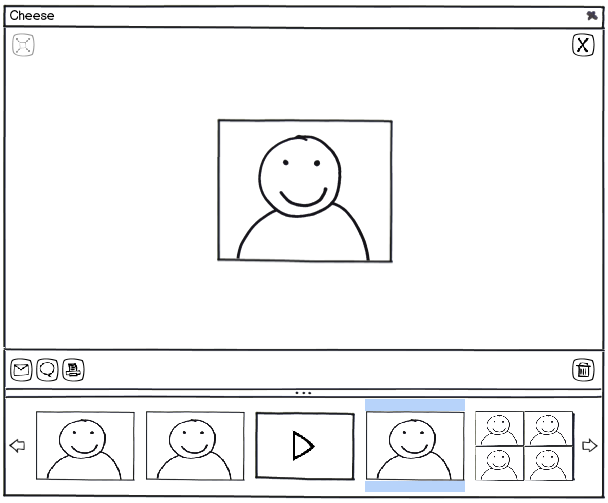
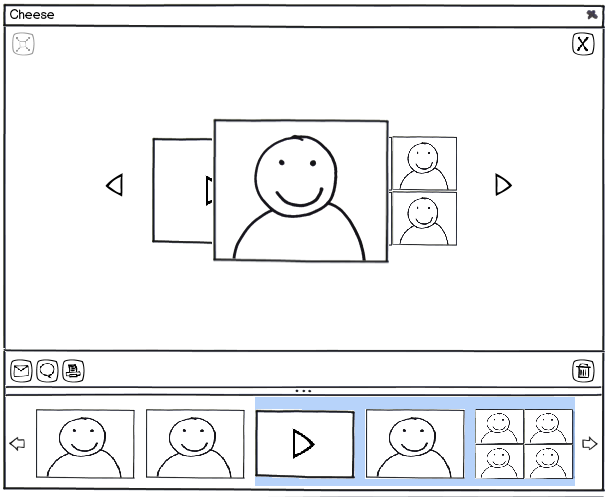
Double-clicking a photo/video or selecting and pressing ENTER should "activate" 'View Mode'. When user testing Cheese, users were not pleased they had to open another application to quick check a photo or a video. There's no need to fancy funcionalities, like zooming, rotating or anything like this. A simple viewer should be fine.
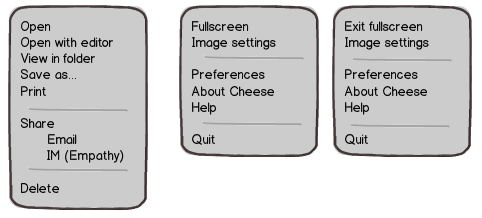
The first menu should be presented when right-clicking a thumbnail or right-clicking the main area in 'View Mode'. The other 2 are application menus.
Fullscreen Mode
It should be easy to exit Fullscreen Mode (F11 to toggle or ESC to exit - when user testing Cheese, most users tried ESC when trying to exit Fullscreen Mode). Fullscreen Mode should work just as the "regular" mode. Event and shortcuts should be the same.
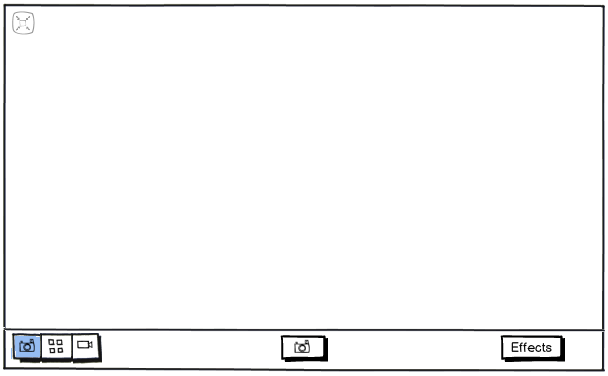
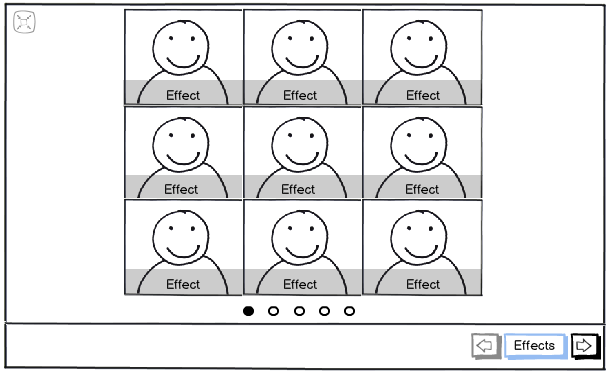
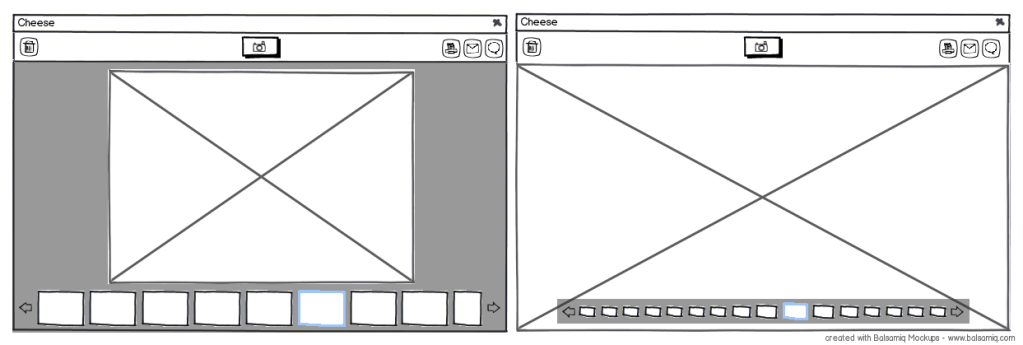
View Mode - Option 1:
Ups: Easier to select a photo/video to view. Downs: The stream in the bottom takes space.
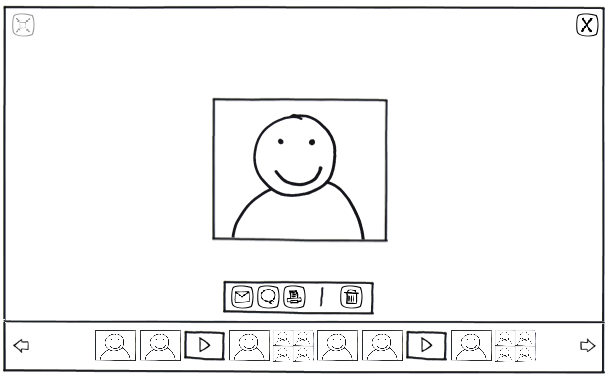
View Mode - Option 2:
Ups: More space to the photo/video being viewed. Downs: You can only see the photo/video took before and after the one being viewed. This makes it harder to navigate and view photos/videos.
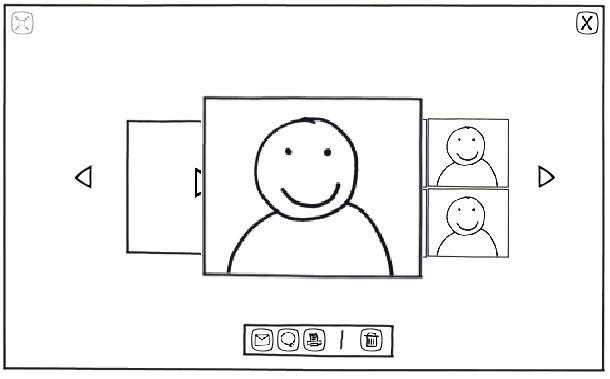
- Both 'View Mode' options show the photo using all the free area (I haven't done it here because Balsamiq is a bad boy and webcam stencils have poor resolution when resized).
- 'View Mode' in fullscreen is the same for when the user selected a single photo/video and when the user selected multiple photos/videos.
- The 'Operations Bar' (the one with the 'Share', 'Delete' and 'Print' options) should probably have some transparency.
Preferences and Settings
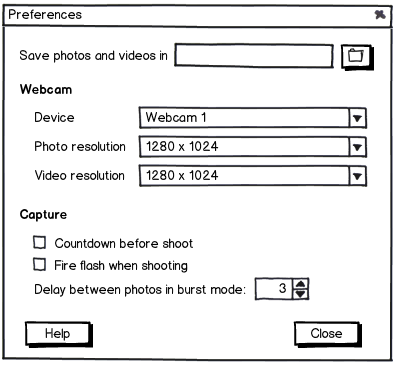
I have separated Image Settings from the Application Preferences. From what I saw when user testing Cheese, user want to change Image Settings more often than they want to change the other options in the Preferences dialog. I suggest turning the Image tab into a Image Settings panel that would turn into a dialog when the user drag it "out" of the main window (and turn back into a panel when dragged into the window). I'm not sure, though, if the panel should be open by default.
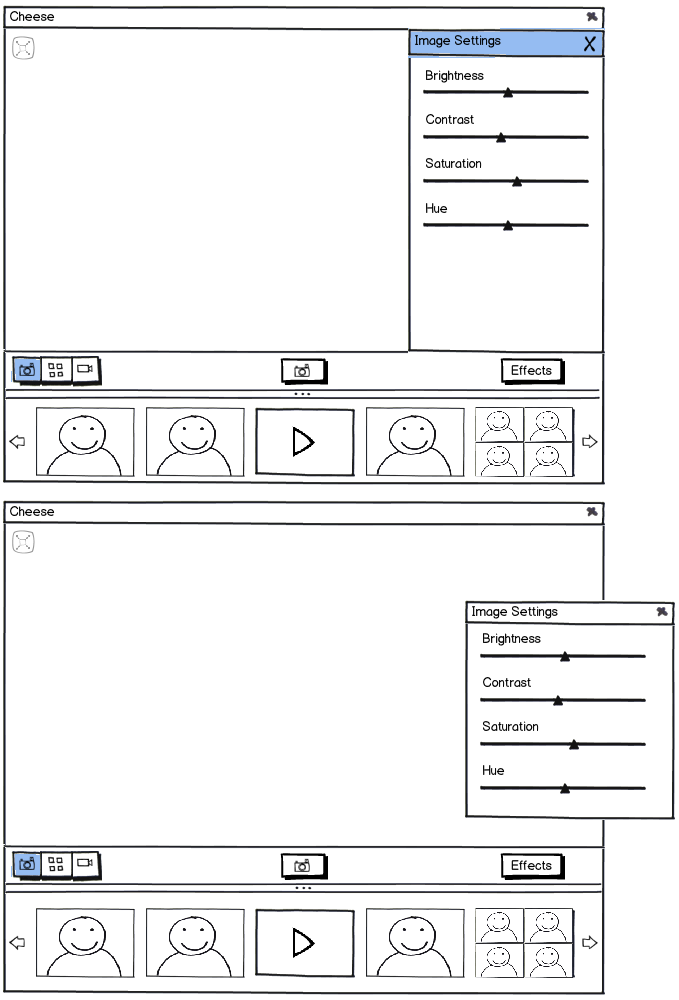
If possible, changes in Image Setting should be applied to what is being presented in the main window. If the user is in 'Camera Mode', changes should reflect in the "webcam". If the user is in 'View Mode', changes should reflect in the photo/video being viewed. This would be a way to easily allow some customization after a photo is taken or a video is recorded.
Second round
This round of mockups focuses on making the UI more dynamic and adjusting the context of UI elements such as the photo stream.
The photo stream should now be presented only in 'View Mode', since it didn't make sense in the context of the others modes. The items in the stream are not relevant when the user is engaging in taking pictures or recording videos. In a similar way, they are also not relevant when the user is selecting effects (unless he/she could apply effects after a photo is taken, which would increase Cheese's complexity - that's the reason why most apps allow effects to be applied or before or after shooting, never both).
One drawback of this approach is that it may not work very well in very large displays. Since it relies on "sliding the shooting mode up" to reveal 'View Mode', in a large display, this movement could take a bit to complete.
Main functionalities
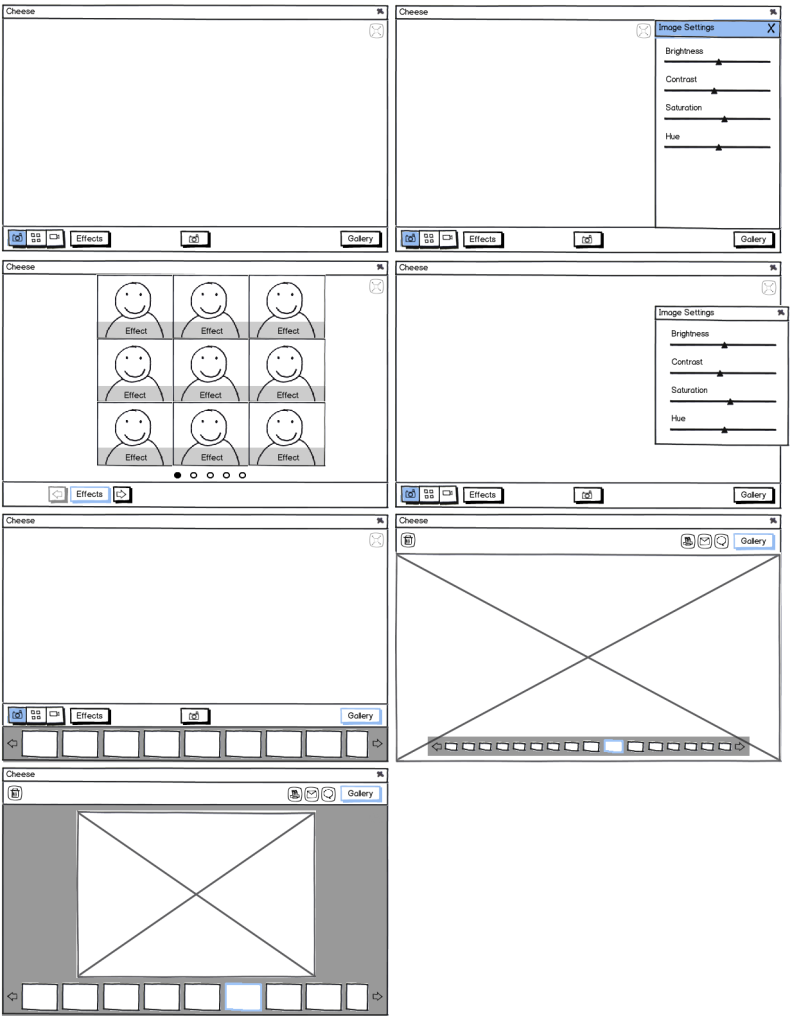
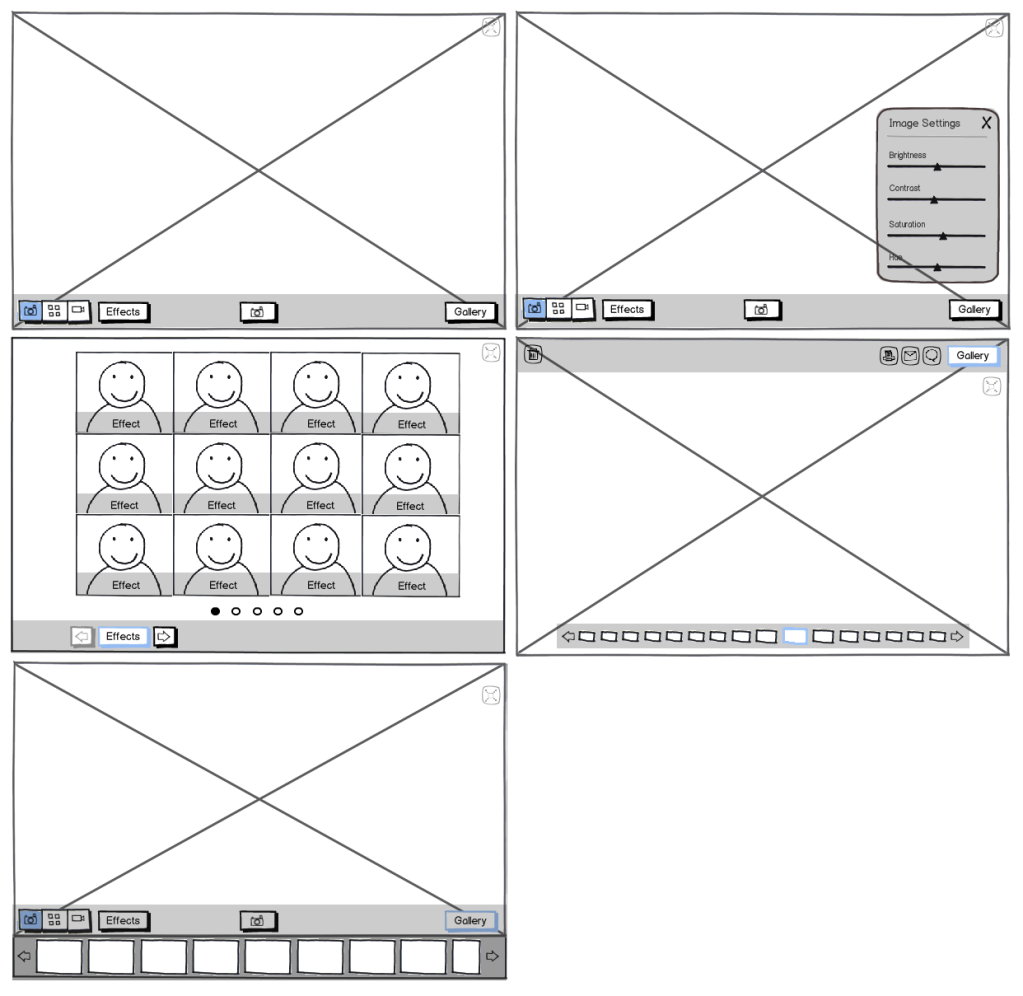
The 'View Mode' consists of 1) the photo/video stream, and 2) operations on items of the photo/video stream. This mode is activated and deactivated by toggling the button [Gallery]. Here are two options of how the interface should behave when the user interacts with the button [Gallery]
Option 1) When the user clicks on the button, the main "toolbar" should slide up until reveal the photo stream (3rd screen in the left, from top to bottom). When the user click on a item in the stream, the main "toolbar", with the webcam view, should continue to slide up until reveal the selected item (4th screen in the left, from top to bottom). The items in the main "toolbar" change to show operations on items. To go back to "shooting mode", the user should click the [Gallery] button again.
Option 2) When the user clicks on the button, the main "toolbar", with the webcam view, should slide up to the top of the scream, revealing the photo stream and an item (a selected one or the first in the stream, depending on the interaction flow) (3rd screen in the right, from top to bottom). To go back to "shooting mode", the user should click the [Gallery] button again.
The 'View Mode' should also be "partially" activated when the user takes a picture, as follows (Option 1 and 2, once again):
This should work as a quick check after a user takes a picture or records a video. Since the user is not properly in 'View Mode', the [Gallery] button was omitted, since I'm considering it as an indicator of either the mode is activated or not. Instead, there's a middle button with a camera icon (or a video icon, depending on the type of media selected last in "shooting mode"), so the user can quickly return to "shooting mode" after this "verification".
Fullscreen Mode
The fullscreen mode mostly behaves as the "regular" mode. The main difference here is that all "toolbars" have some transparency, revealing, in "shooting mode", the webcam view, or, in "view mode" photos and videos in its background. Option 2 of 'View Mode' probably works better for 'Fullscreen mode', since Option 1 doesn't take advantage of the fullscreen to present the selected item in the stream.
Tentative Design
